Running a capable language model on your own machine used to mean wrestling with Python environments and CUDA drivers for an afternoon. It doesn't anymore. Two projects do most of the work: Ollama handles the model engine, and Open WebUI gives you a browser interface that looks and feels like ChatGPT.
Put them together and you get a private assistant that runs entirely on your hardware — no subscription, no data leaving the machine, and it works offline once the model is downloaded.
This walks through the whole thing: installing Ollama, pulling a model, running Open WebUI in Docker, and connecting the two. Budget about 15 minutes of active work, plus download time for whatever model you pick. The one decision that actually matters — which model your machine can run — comes first, because picking wrong is the most common way people get a slow, frustrating result.
How the two pieces fit
Ollama is the backend. It downloads models, loads them into memory, and exposes a local API on port 11434. You can talk to it straight from the terminal, but the terminal isn't a great place to live.
Open WebUI is the frontend — a self-hosted web app that talks to Ollama's API and gives you chat history, multiple model switching, document upload, and user accounts. It runs in its own container and connects to Ollama over HTTP. Neither piece phones home; both run locally.
Check your hardware before you install anything
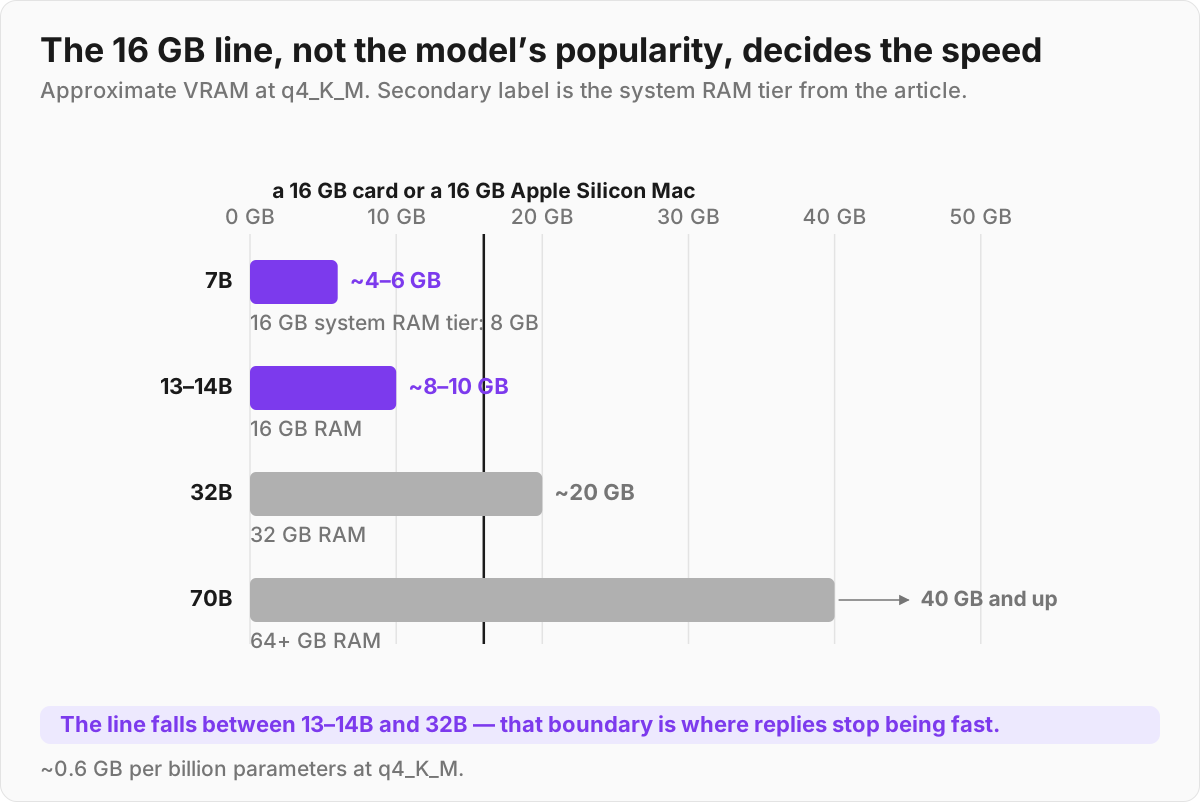
Model size is measured in billions of parameters (the "7B" or "70B" in a model name). The rough memory cost at the default q4_K_M quantization is about 0.6 GB per billion parameters, plus headroom for context. That gives you a quick way to know what fits before you waste a download.
| Model size | Approx. VRAM | System RAM | Realistic on |
|---|---|---|---|
| 7B | ~4–6 GB | 8 GB | Most modern laptops, 16 GB Macs |
| 13–14B | ~8–10 GB | 16 GB | Mid-range GPUs, 16 GB+ Macs |
| 32B | ~20 GB | 32 GB | RTX 4090 / high-end cards |
| 70B | ~40 GB+ | 64 GB+ | Multi-GPU or workstation |
A few things worth knowing. q4_K_M is the quantization to default to — it cuts memory by about 42% versus q8_0 — and roughly 70% versus full-precision f16 — with little quality loss, which is why most people run it.
(q8_0 is itself a quantization, not the original weights; the uncompressed baseline is f16.) Apple Silicon Macs use unified memory, so a 16 GB Mac comfortably handles 7B–14B models without a discrete GPU. And if a model doesn't fit in VRAM, Ollama doesn't crash — it offloads layers to system RAM and CPU.
It still answers, just dramatically slower — often by an order of magnitude, depending on how many layers spill to CPU. That's the trap: it "works," so people don't realize they picked too big a model until every reply crawls.
A 16 GB card such as the RTX 4060 Ti, or a 16 GB Apple Silicon Mac, comfortably runs a 7B–14B model.
Step 1 — Install Ollama
Go to ollama.com/download and grab the build for your OS.
- macOS: download the app (requires macOS 14 Sonoma or later) and open it.
- Windows: run the
.exeinstaller. - Linux: one line —
curl -fsSL https://ollama.com/install.sh | sh
Once it's installed, Ollama runs a background server at http://localhost:11434. Confirm it's alive:
ollama --version
If you want to see the server respond directly, open http://localhost:11434 in a browser — you should see Ollama is running.
A note on versions: Ollama and Open WebUI both ship new releases every few days. At the time of writing Ollama is on the v0.32.x line and Open WebUI on v0.11.x, but don't anchor to a specific number — check the Ollama releases and Open WebUI releases pages for the current build.
Step 2 — Pull and test a model from the terminal
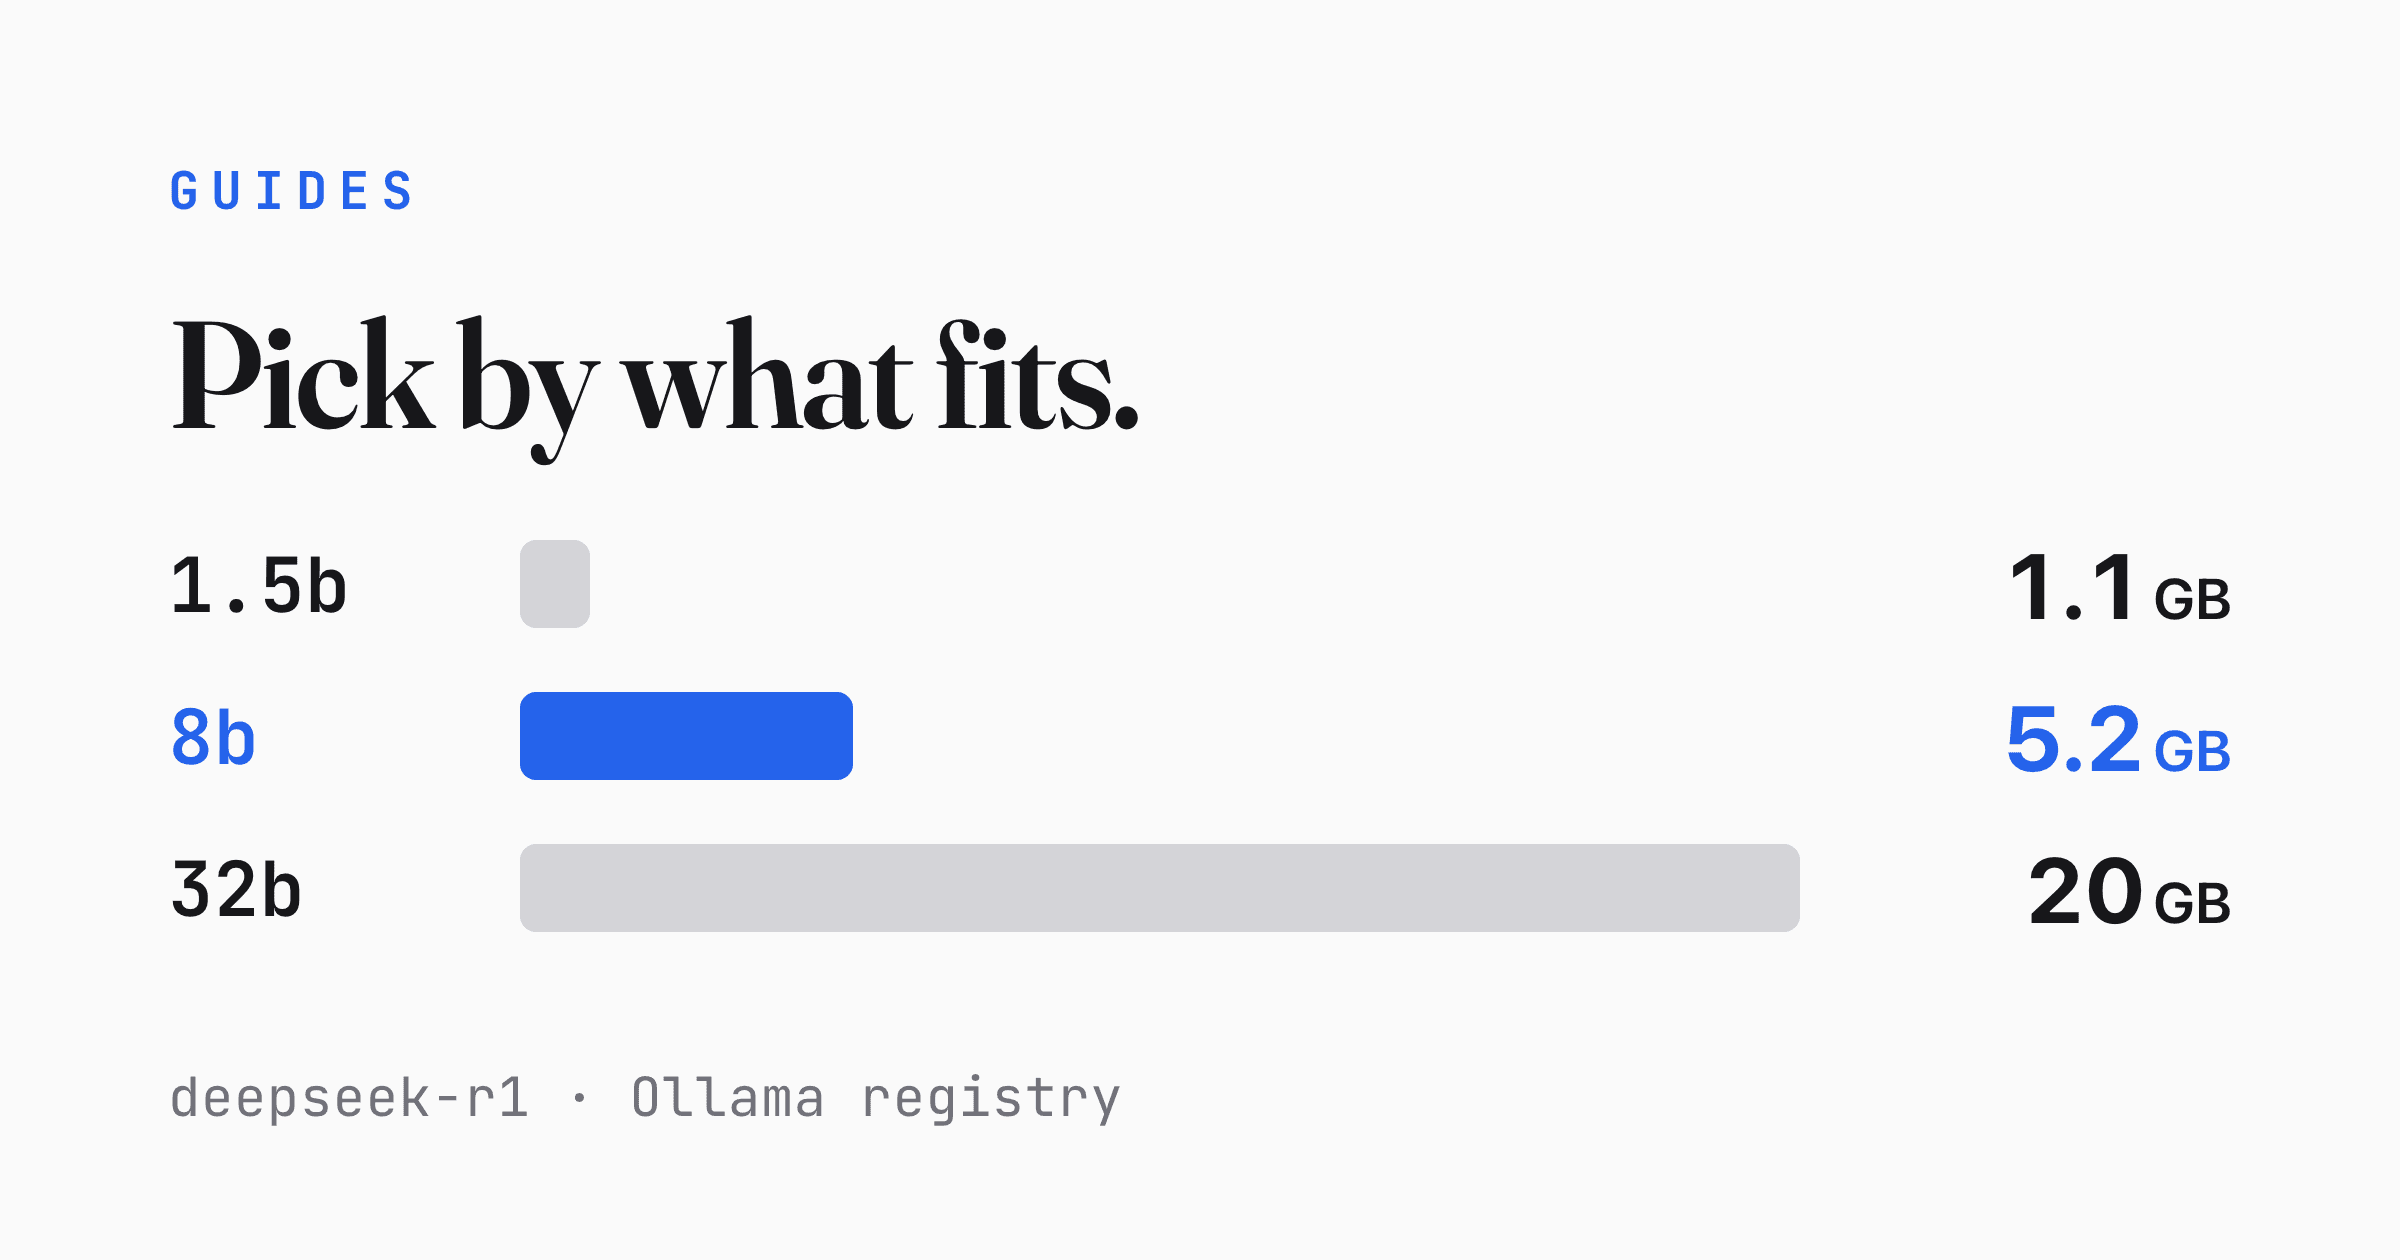
Browse the model library to see what's available. For a first run, pick a small instruct model in the 7B–8B range so it works on modest hardware. Well-established families worth starting with: Llama, Gemma (the smaller gemma3 variants), Mistral, Qwen (likewise, the smaller qwen3 variants), and DeepSeek-R1 for reasoning tasks.
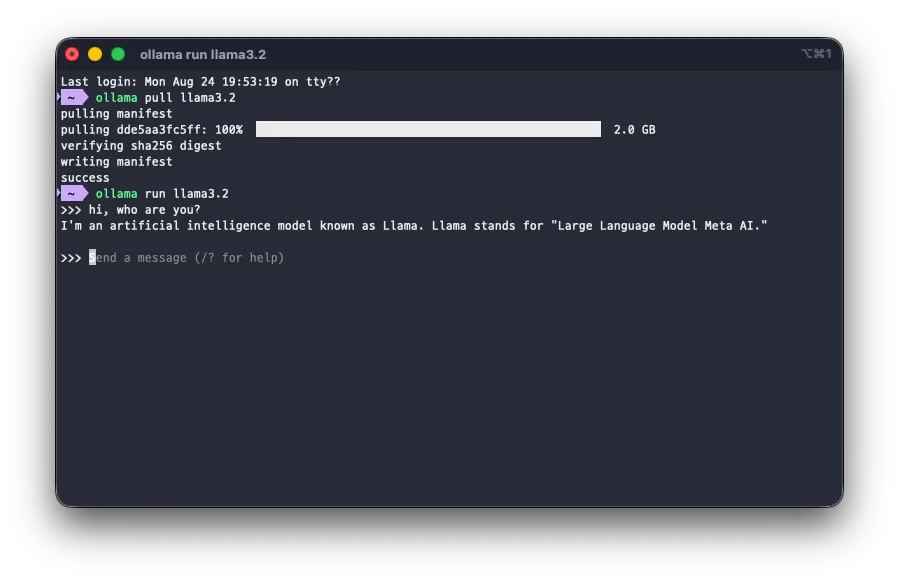
Pull and run one in a single command:
ollama run llama3.2
The first run downloads the model (a few gigabytes), then drops you into a chat prompt. Type a question, confirm it answers, then exit with /bye. Some useful commands:
ollama pull <model>    # download without chatting
ollama list            # show installed models
ollama serve           # run the server manually if needed
That's the backend working. Now the interface.
Step 3 — Install Open WebUI with Docker
You'll need Docker installed. With Ollama already running natively on the host, this is the command:
docker run -d -p 3000:8080 \
  -v open-webui:/app/backend/data \
  --name open-webui \
  --restart always \
  ghcr.io/open-webui/open-webui:main
What each flag does:
-druns it in the background.-p 3000:8080maps the container's internal port 8080 to host port 3000, so you open it athttp://localhost:3000.-v open-webui:/app/backend/datais the one you must not skip — it persists your accounts, chats, and settings to a named volume. Leave it out and recreating the container wipes everything.--restart alwaysbrings it back after reboots.:mainis the tag that always points to the newest build.
-p 3000:8080publishes on all interfaces (0.0.0.0), not just localhost — anyone on your network can reach the UI. For a single-machine setup use-p 127.0.0.1:3000:8080instead. Open WebUI's own hardening guide says it is "built for private, trusted networks" and should not be exposed to the public internet without an access-control layer in front (VPN, zero-trust proxy, or an authenticating reverse proxy). Note too that without Redis, signing out does not invalidate a token — it stays valid for up to four weeks.
Open http://localhost:3000 once it starts.
One licensing note before you deploy this anywhere shared: Open WebUI is not plain BSD-3. Clause 4 of its license forbids altering or removing the "Open WebUI" branding, with three exceptions — 50 or fewer users on a 30-day rolling basis, written permission from the maintainers, or an enterprise license.
Step 4 — Connect Open WebUI to Ollama
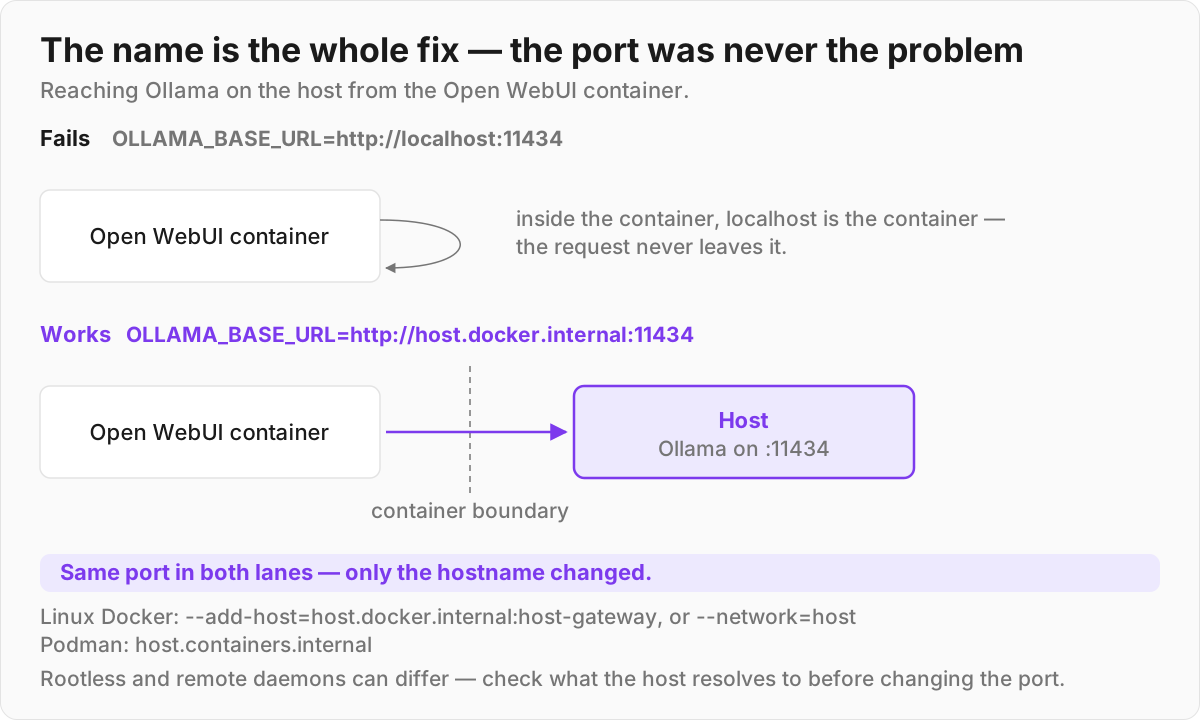
If Ollama is on the same machine, Open WebUI usually finds it. If it doesn't, the issue is networking: the container can't reach localhost on the host, because inside the container localhost means the container itself.
The fix is host.docker.internal. Either pass it at startup:
-e OLLAMA_BASE_URL=http://host.docker.internal:11434
or set it later in the UI under Settings → Admin Settings → Connections. On Linux Docker you also need to add --add-host=host.docker.internal:host-gateway so the container can resolve the host (--network=host is the other documented fix). Podman users use host.containers.internal instead.
If you'd rather skip installing Ollama separately, there's an all-in-one image that bundles both:
docker run -d -p 3000:8080 \
  -v ollama:/root/.ollama \
  -v open-webui:/app/backend/data \
  --name open-webui \
  --restart always \
  ghcr.io/open-webui/open-webui:ollama
This is the simplest path for beginners — one container, nothing else to install. Add --gpus=all for GPU acceleration, and there's a :cuda tag for CUDA support. The trade-off is less control over the Ollama side; the native-Ollama-plus-Docker-WebUI setup gives you that back. The port-binding note above applies to this image too.
| Setup | Best for | Trade-off |
|---|---|---|
| Native Ollama + Docker WebUI | More control, easier GPU tuning | Two things to install |
All-in-one :ollama image |
Simplest start, one container | Less granular control |
Step 5 — First login and first chat
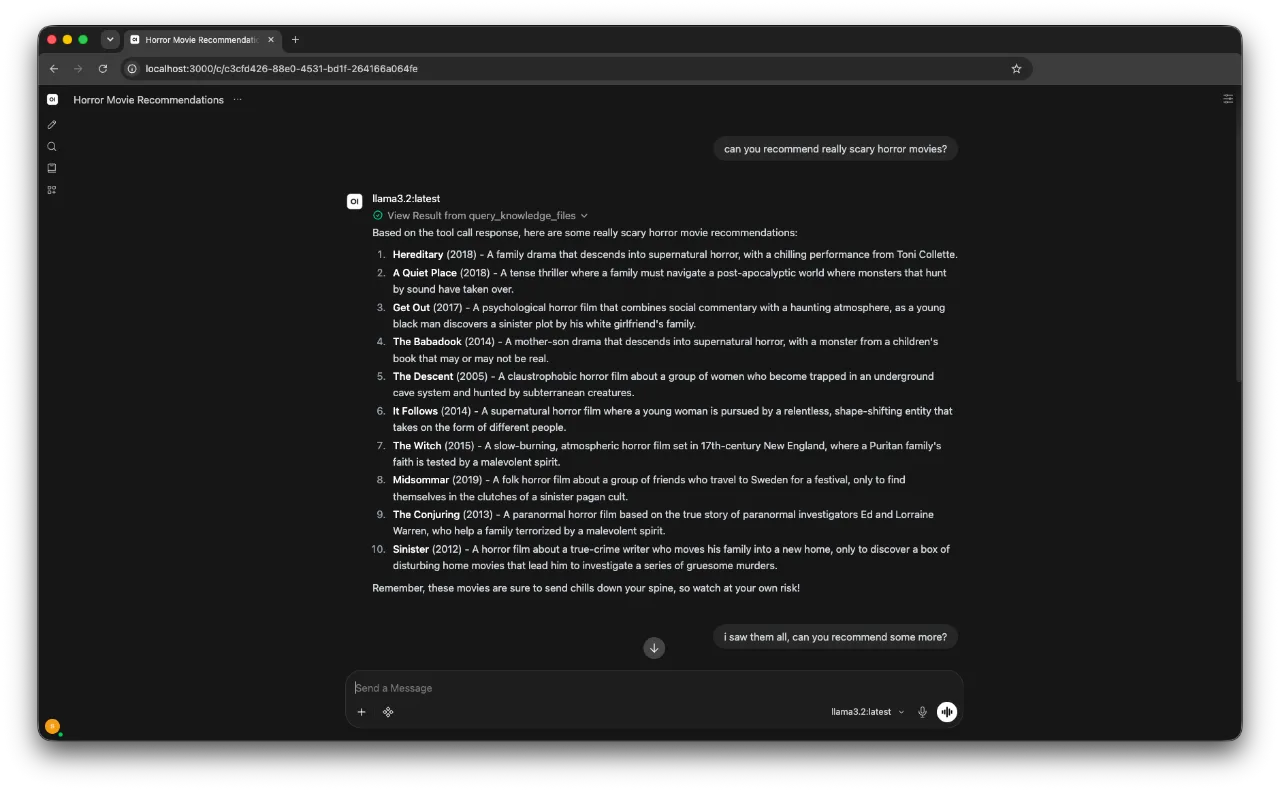
The first time you open the UI, it asks you to create an account. This surprises people on a local-only app — but the account is stored locally, not in any cloud, and the first account you create becomes the admin. It's there so multiple users on the same machine can have separate histories.
After signing in, pick your model from the selector at the top, type a prompt, and you have a private ChatGPT-style assistant running on your own hardware.
Going further
Add more models any time with ollama pull <model> — they show up in the UI selector automatically. For speed, the GPU flags above matter most. To update Open WebUI, pull the latest image and recreate the container; because your data lives in the named volume, nothing is lost:
docker pull ghcr.io/open-webui/open-webui:main
docker stop open-webui && docker rm open-webui
# then re-run the docker run command from Step 3
Open WebUI also supports document upload and RAG, so you can ask questions against your own files — worth exploring once the basics work.
Troubleshooting
The UI loads but shows no models. Open WebUI can't reach Ollama. Check the connection URL under Settings → Admin Settings → Connections and use host.docker.internal:11434 rather than localhost. On Linux, confirm you started the container with --add-host=host.docker.internal:host-gateway (or --network=host).
Replies are painfully slow. The model is bigger than your VRAM and Ollama is offloading to CPU. Drop to a smaller model or a more aggressive quantization. Check fit against the table above.
Port 3000 is already in use. Change the host side of the mapping, e.g. -p 127.0.0.1:8080:8080, and open the new port.
Changes vanished after recreating the container. You ran it without the -v open-webui:/app/backend/data volume. Always include it.
Someone else on the network opened your chat history. You published on 0.0.0.0. Recreate the container with -p 127.0.0.1:3000:8080, and treat every existing session token as still live until it ages out.
Once it's running, the whole stack is yours: no usage caps, no per-token billing, and your prompts stay on your machine. When you're ready for a bigger model, start from the official library, and keep the Open WebUI docs open when you want to go deeper.