Someone sends you a .json file and says "just load this workflow." You drop it into ComfyUI, hit the run button, and half the nodes turn red with errors. That gap — between having a workflow file and actually getting it to produce an image — is where most people get stuck.
A ComfyUI workflow is three things in sequence: you load it, you run it, and eventually you customize it. Get those three verbs straight and almost any workflow you find online becomes usable, no matter how intimidating the node graph looks.
What a workflow actually is
A workflow is a directed graph of nodes — model loaders, samplers, conditioners, post-processors, savers — wired together and serialized as a plain-text JSON file. That JSON is human-readable, compact, and lives independently of the images it produces.
Because it's just text, a workflow is reproducible: share it, commit it to version control, load it on a different machine, and you get the same pipeline back.
That's the whole reason people pass these files around. The .json is the recipe.
30-second orientation
ComfyUI is free and open-source, node-based, and it moves fast. Releases land every few days, sometimes several in a single day — v0.33.1 as of August 13, 2026, and it will have moved by the time you read this. One practical consequence: exact button labels, menu names, and template lists drift between versions, so don't be alarmed if a screenshot in some tutorial doesn't match your screen pixel-for-pixel.
The concepts below are stable even when the labels aren't.
If you're installing fresh, ComfyUI Desktop is the path of least resistance: one-click install on macOS and Windows, plus GUI management of models and custom nodes. ComfyUI Manager now ships enabled by default for Desktop users, and is built into most current releases — which matters the moment a downloaded workflow asks for nodes you don't have.
Load
There are three ways to get a workflow onto the canvas, and they all end in the same place:
| Method | How | When to use |
|---|---|---|
| Drag & drop | Drop a .json file — or a PNG/WebP/video with the workflow embedded in its metadata — onto the canvas |
Fastest for files you downloaded |
| Open | Menu, or Ctrl/Cmd + O |
When the file is sitting in a folder |
| Workflows sidebar | Click the folder icon, pick from your saved list | Reopening your own work |
The metadata trick is worth dwelling on: a single output image can carry the entire workflow inside it. Drop that PNG on the canvas and the graph rebuilds itself. (More on the catch later.)
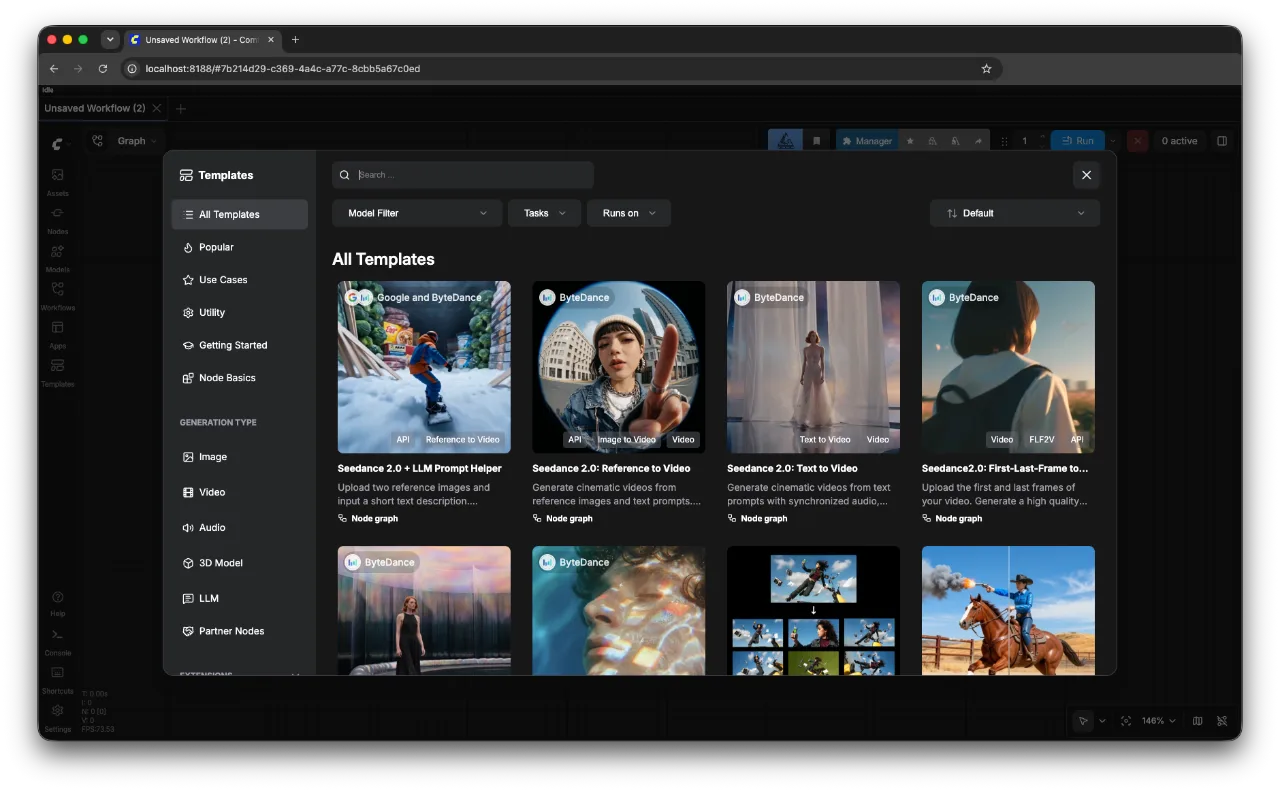
If you're new, skip the downloaded files at first and start with Browse Templates in the main menu (or the Templates sidebar icon). Templates use only core nodes, so nothing is missing, and they auto-check for required models, prompting you to download anything you're lacking. It's the one starting point that won't fight you.
Run
Once the graph has its models, input images, and prompts in place, click the run button to execute — it doesn't run inline, it appends the workflow to the generation queue. Ctrl/Cmd + Enter does the same thing; Ctrl/Cmd + Shift + Enter pushes it to the front of the queue instead.
The queue panel shows you what's running and what's waiting, which matters when you're firing off several variations in a row.
"Ready" has a specific meaning here: every model the graph references is downloaded, every input the graph expects (image, mask, prompt) is supplied, and no node is in an error state. If any of those is false, running either does nothing useful or throws.
Programmatic execution submits to the POST /prompt endpoint, but you don't need that for normal use — it matters once you're automating, which I'll come back to.
The missing-nodes wall
This is the single biggest reason a downloaded workflow "doesn't work," and most tutorials skip right past it.
You load a community workflow and some nodes show up red, undefined, or with names ending in a pack suffix like (mtb). Those are custom nodes — community extensions that aren't part of core ComfyUI. The graph references them, but your install doesn't have them.
The fix is ComfyUI Manager:
- When a workflow with missing nodes loads, ComfyUI Manager prompts you — pick Install All, or Open Manager to review first.
- Already past the prompt? Select the red node and click Missing in the preview panel.
- If a pack isn't in the registry, use Install via Git URL at the bottom of the Manager window. Cloning into
custom_nodes/by hand still works as a fallback. - Restart ComfyUI, then check the startup log for
import failed.
That last line is where a half-installed pack confesses. A custom node usually ships a requirements.txt of Python dependencies; if one fails to install, the node stays broken even after a restart, and the log is the only place it says so.
If you cloned a pack by hand in step 3, restarting is the step people skip — do it before you conclude the install failed.
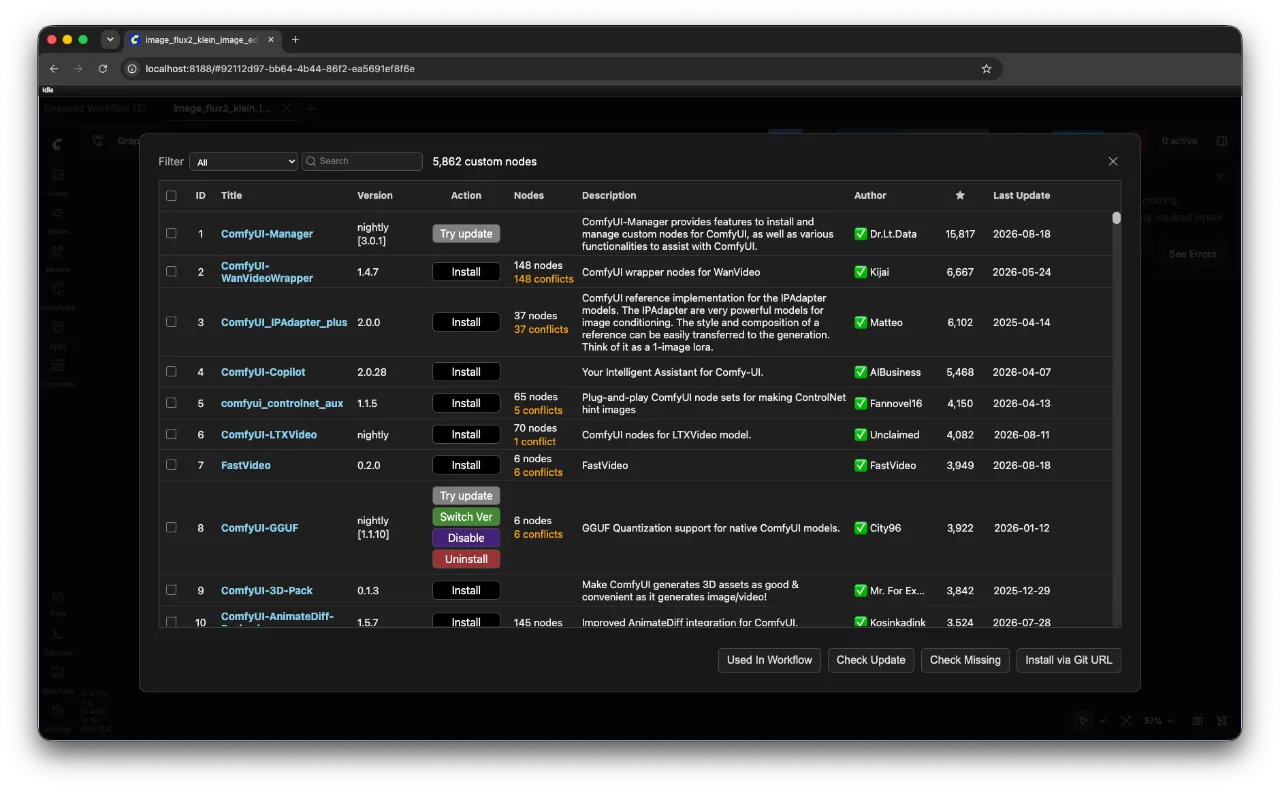
One hard rule: only install custom nodes from trusted, community-vetted authors. Custom nodes run arbitrary Python inside your environment. A node from a random link has the same access to your machine as any program you'd run — treat it that way.
Customize
A workflow is just a graph, so editing it is mostly drag, click, and type:
- Swap the model: change the checkpoint or model loader to a different one you have on disk.
- Tune the sampler: adjust sampler, scheduler, steps, and CFG to trade speed against quality.
- Edit the prompts: the positive and negative prompt nodes are plain text fields.
- Re-wire: drag a connection from one node's output to another's input to change how data flows.
When you're happy, save it. Two options, with a catch. You can export a .json file, or you can save an output image — which embeds the workflow in the image's metadata. The catch: compression or network transfer through chat apps and social media often strips that embedded metadata, so the image arrives looking fine but carries no workflow.
Keep the .json as your source of truth and treat the image-embedded copy as a convenience, not a backup.
One more caveat from the fast release cadence: very old JSON workflows may not load cleanly in a much newer ComfyUI, because nodes get renamed or replaced over time. If an ancient workflow throws on load, version drift is a likely culprit.
Going further: API format
The JSON you normally save includes UI metadata — node positions, colors, groups, sizes. The API format throws all of that away and keeps only nodes, class types, and input connections. It's smaller, cleaner, and it's the format you need when calling ComfyUI programmatically (that POST /prompt endpoint).
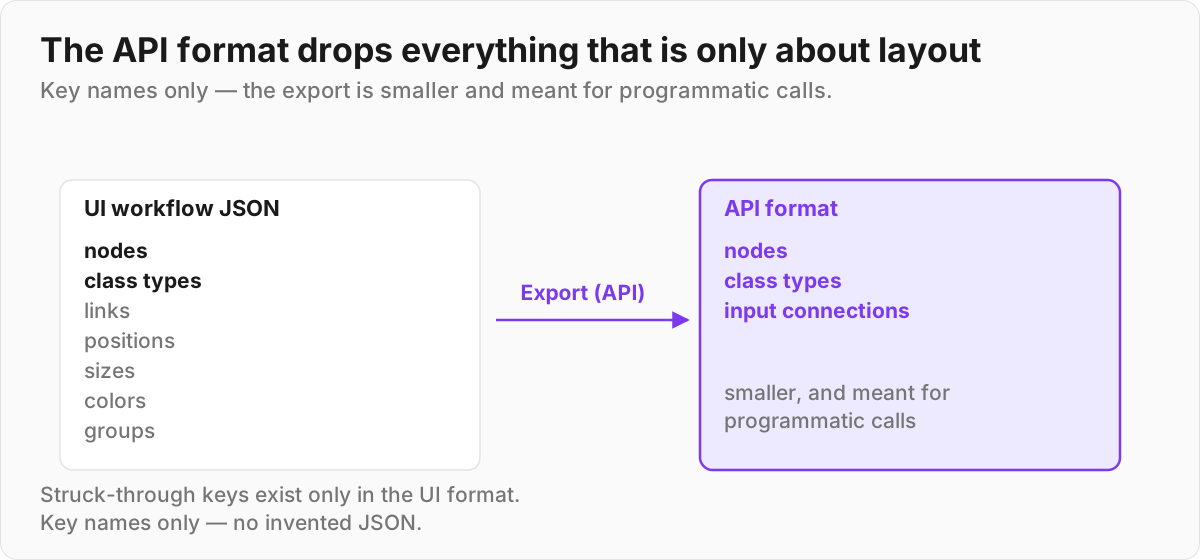
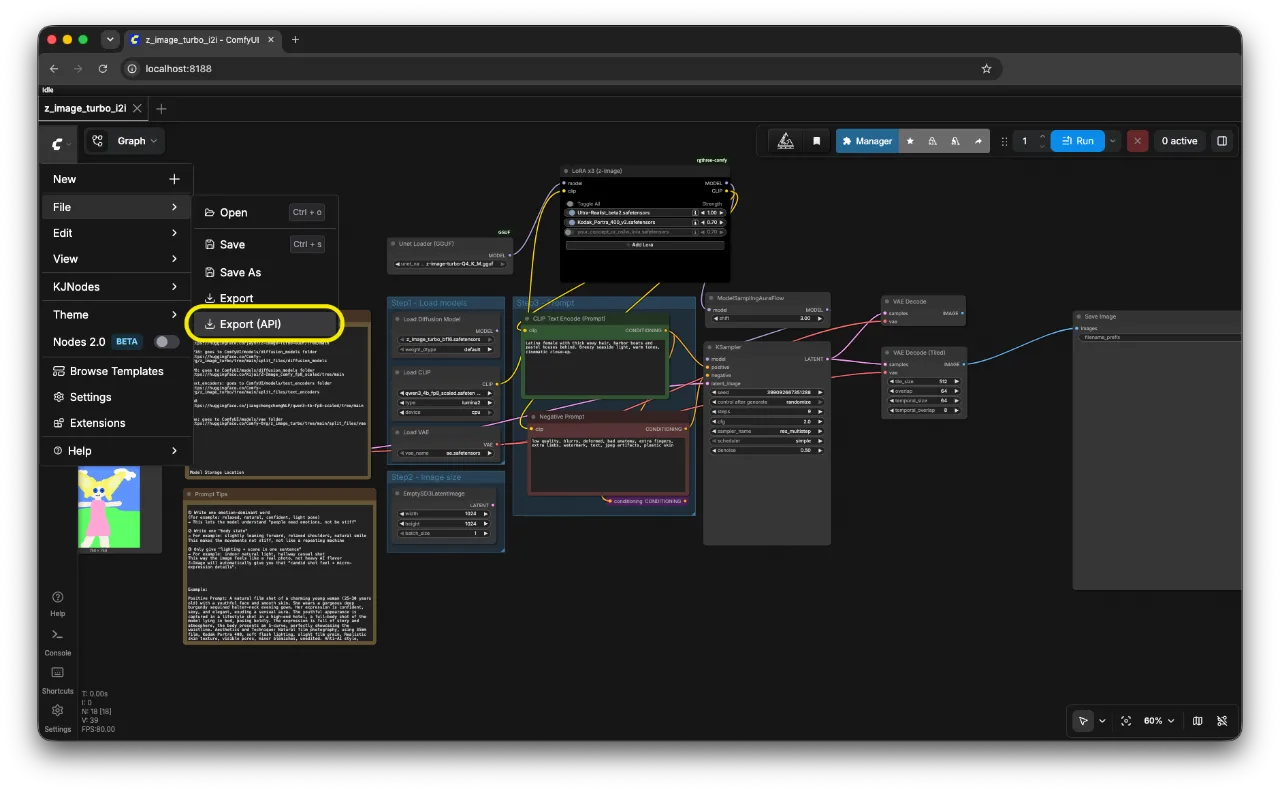
To get it, use File → Export (API). Older guides tell you to enable "Dev mode" in Settings first — that's no longer required. You won't touch this until you're scripting batch jobs or wiring ComfyUI into another app — but when that day comes, this is the export you want.
Where to find workflows
| Source | What it is |
|---|---|
| Comfy.org templates | Official, core-node-only, beginner-safe |
| ComfyWorkflows.com | Large community catalog |
| OpenArt | Workflow sharing with previews |
| Civitai | Models and workflows together |
| RunComfy | Curated workflow catalog |
| Official examples (GitHub) | Reference workflows from the maintainers |
A licensing gotcha that's easy to miss: the workflow file is generally fine to reuse, but community workflows often reference models under non-commercial licenses. If you're producing anything commercial, check the license on every model the graph loads and swap out the restricted ones before you ship.
Pick one template, run it unchanged, then change exactly one node — the model, or the steps, or a single prompt line — and run it again. That one-variable loop teaches you more about how a workflow behaves than reading another guide will.